Category Archives: Jeremy

Remote Blood Sugar Monitoring

With Samantha about to start in the competitive gymnastics program, we really needed to have a better way to monitor her blood sugar.  In the recreational program which she has been a part of until now, Cynthia or I would sit in the waiting room.  She would stop by and let us test her if she felt low.  With the activity, she did tend to drop during her gymnastics classes.

But for the competitive program, the coaches really do not want the parents sitting in the waiting area and potentially distracting the girls.  I am sure they would make an exception for us but we wanted to give Samantha some more space.  At the same time, we knew that gymnastics was one of those times that her blood sugar needed to be watched closely.

We decided to get a continuous glucose monitor for Samantha.  There is a sensor which is inserted into her skin and replaced every several days.  A transmitter sits on top of the sensor and send the readings every five minutes to a receiver wirelessly.  The receiver has a screen and you can look at recent readings and trend arrows that tell you how her sugar is changing.

The receiver needs to be within about 20 feet or so though.  To make the next jump, we used something called NightScout.  NightScout is a project by several people online to piece together a way to monitor blood sugar remotely.  You connect the receiver to a cell phone using a USB cable.  The cell phone runs a special app which reads the blood sugar readings from the receiver and sends them out to a database you setup on the Internet.  You also setup a web server on the Internet which reads the database and presents the readings to a web browser.  Then, there are apps for the iPhone and other devices which display the data.

The NightScout setup instructions describe how to setup a database and a web server on two different hosting platforms.  Initially, I setup services on these other hosting platforms.  I did this so I could at least test everything and ensure it was all working.  Easiest to follow the instructions exactly the first time.  Once I saw how it actually worked, I was ready to do it my way.

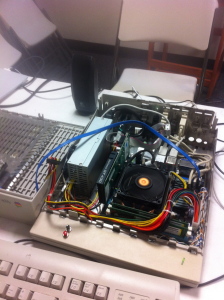
I have had my web hosting with Dreamhost for years and I really didn’t want to suddenly use a bunch of other services.  First, I needed to move my existing web sites (including this one) from their shared servers to a VPS (virtual private server).  The web server for NightScout is node.js based and will not work from a shared server.  Dreamhost moved my existing websites to the VPS without a hitch.

Next, I setup the NightScout database on my new VPS.  I redirected the cell phone to send the readings to my new database and sure enough, I started getting data.  I changed the web server (still at the non-Dreamhost server) to get its data from my VPS hosted database and that worked.  Now I needed to move the web server.

I grabbed a copy of the Javascript source for the node.js server and poked around for bit.  The instructions have you use these other hosting services partly because they are cheap but also they have nice interfaces for configuring everything.  I was working from a command line into my VPS and trying to figure out how to configure things.  When the instructions said to set a field in a form to X, what do I need to do in order to accomplish the same thing.

After browsing the code for the server a bit, I wrote a simple script to setup some config options and launch the server.  After a couple of tries, I got the script right and the server started working.

With that up, I changed Cynthia’s and my phone to pull data from the server running on our VPS.  I decommissioned the services I setup with the other providers.  The entire solution was now running through a VPS I managed.  I wrote a backup script to make sure all of this configuration was backed up every night.  The backups go back to our computer at home.

We even bought a Pebble watch for Cynthia which lets you have the blood sugar readings right on the screen of the watch.  So, here is the sequence of events to get blood sugar readings to us:

  1. The sensor takes a blood sugar reading.
  2. The transmitted connected to the sensor sends that reading to the CGM receiver wirelessly.
  3. The cell phone pulls that reading from the CGM receiver through a short USB cable.
  4. The cell phone uploads the reading to the database running in our VPS.
  5. The web server on our VPS provides that reading and all other data to any client which requests it.
  6. Our iPhones have apps on them which will communicate with the web server on the VPS and display the blood sugar values and trends in real time.

The only requirement is that the receiver/cell phone stay within about 20 feet of Samantha and that the cell phone has a good Wifi or cell signal so it can upload the data.  This will be how we give Samantha more independence while also continue to be able to manage her blood sugar.

Infiniti Q50

I bought a new car.  And not just new to me.  An actual, for real, new car.

When we moved to California, we had to buy cars for both Cynthia and I.  Importing our existing vehicles was more trouble than it was worth.  We both bought used cars.  Cynthia got a 2007 Toyota Matrix and I got a 2005 Infiniti G35.

I have always been happy with the G35 but it was now ten years old and it was time for something new.  That something new was the Infiniti Q50.  It is essentially the successor of the G35 I was driving but in some ways, it is an entirely new car.

The Q50 has “drive by wire”.  The steering wheel has a mechanical connection to the wheel but that is a backup.  With the Q50, when you turn the steering wheel, software responds to that and makes the appropriate change to the direction of the front tires.  Feedback goes both ways so you still get a feel for the car through corners.  This also allows you to select the kind of handling you want.  Do you want loose casual handling?  Do you want tight control in “sport mode”?

It has a pile of safety features.  It has blind spot detection so small lights on either side come on if there is a vehicle in a blind spot.  If you try to turn towards a car which is in your blind spot, it sends an audible alarm.  It will even take temporary control and stop you from steering into the other car.  Again, because it is “drive by wire”, it can do these kinds of things in software.  The Q50 even tries to detect the lanes and it will warn you if you are drifting out of your lane.  Again, if you ignore the alert, it will take over and put you back in your lane.

The Q50 is monitoring the distance between you and the car in front of you.  If that car brakes quickly, the Q50 will brake for you in order to try to avoid an accident.  Even more, the Q50 is monitoring the distance between the car in front of you and the next one ahead.  If the car in front of you is closing quickly on the next car, then chances are the driver ahead of you is going to slam on the brakes.  Again, the Q50 will brake preemptively.  I have seen this come on at times and it feels strange to suddenly be slowing when maybe you still have your foot on the gas.  But there is evidence that features like this really do reduce the chance of collisions, so I am willing to put up with that odd feeling the very few times it happens.

But the feature I like the most is the adaptive cruise control.  We drove to Toronto recently and it was my first chance to really try it.  Basically, you set a target speed and the Q50 tries to go that fast.  But if you are approaching someone going slower, the car automatically slows down to keep a safe distance.  You have some control over what that safe distance is.  I think I took cruise control off three times in the whole trip to Toronto.  I had cruise control on through Toronto highway traffic!  As you approach someone going slower, you just signal and switch to the right lane.  The Q50 detects that the lane is clear and goes back to the target speed.  No need to turn off cruise control.  Normally, you have to make decisions.  Can I leave cruise on?  How close will I get to this guy in front of me before I can get to the right and pass him?  And you are always tempted to get too close.  Now, I just don’t worry about it.  The car is managing my speed.  I am just making decisions about which lane to travel in and when it is safe to switch.  The stress level for the trip was definitely lower.

I am very happy with my new car.  And it is definitely an intermediate point along the way to truly self-driving cars.  I like to drive but if I could have let the car drive us to Toronto on our recent trip, I would have.

KansasFest 2012

IMG_0210This story begins early in 2012. I was listening to the latest episode of Retro Computing Roundtable, a podcast about old computers, when they started talking about KansasFest. KansasFest is a gathering of Apple // enthusiasts which has been happening yearly for many years. The 2012 event would be their 24th and the hosts of the Retro Computing Roundtable announced on their podcast that they would all be attending.

Among the hosts is Earl Evans who had often talked about wanting to attend KansasFest the same way that I had over the years. In university, I just didn’t have the money. After university, I was focused on my BeBox and BeOS. And then I was married and Matthew and Samantha arrived. There always seemed to be a good reason why I couldn’t go.

But Earl and the rest of the hosts found a way. I literally paused the podcast and started thinking “why couldn’t I go this year”. Maybe it would be too costly? But I have lots of air miles – enough to get me a flight there for free. And the cost of the event itself is cheap considering that meals and lodging is included. Would my family be OK with me going on a “vacation” by myself? And there is the problem that our wedding anniversary happens during KansasFest.

So, I asked the boss and after a bit of negotiating, I had my OK. I booked my flight and registered. I was going to KansasFest!

I subscribed to the KansasFest mailing list and as the date drew closer, the traffic on the list increased along with my excitement. At one point, someone sent an email asking who was going to be bringing real Apple //’s to the event. I was surprised to see how many people were bringing their old computers. I really wanted to bring my Replica One or my Apple //e but I didn’t trust the airline to treat them properly. I was only planning to bring my MacBook and an iPad.

But everyone seemed to be bringing a pile of cool old hardware. I needed to bring something so I looked around my room and saw my Curta mechanical calculator. That was something I could easily transport and people should be interested in that. So, I replied to the mailing list that I wasn’t bringing any of my Apple //’s but I would have my Curta.

Soon enough, I was in Kansas City and meeting people who I had heard of by watching the Apple // community. People like Ken Gagne, Tony Diaz, Geoff Weiss and more. I listened to John Romero describe the early days of game programming on the Apple // and the strange characters who wrote some of those classics. Randy Brandt talked about Beagle Bros. and the story of AppleWorks. Randy is a Canadian originally from Manitoba and we chatted for a short time about that. I met Vince Briel who created the Replica One which I built. I demonstrated the Curta to many people and it was definitely a unique bit of hardware at KansasFest.

At meals, people would often ask if I was working on a HackFest entry. HackFest is a programming competition where you create something during KansasFest and on the last day, everyone demonstrates their program. They are judged and winners are selected. I had a big project I was working on before KansasFest which was not eligible under HackFest rules and I planned to continue working on it throughout KansasFest. But everyone was encouraging me to do something for HackFest.

Walking back to the dorms afterwards, I started to think what I might do for HackFest if I was going to enter. Then I realized that what I should do is write a simulator of a Curta calculator for the Apple //. The Curta has a crank as its primary interface and I could simulate a crank using the joystick. With a bit of graphics and sound, I could make a pretty good simulation of a Cuta.

I started working on it right away. I used my MacBook and coded it in C using the cc65 cross compiler. I tested it using the Virtual ][ emulator. First, I got a basic simulation of the Curta working. I controlled the calculator using the keyboard on the first version and the output was just text. But that was the basics. I had something which worked and if all else failed, this could be my HackFest entry.

CurtaSimNext, I added graphics. I used the 280×150 resolution Apple // hi-res screen. The bottom of the screen has four lines of text which I used to display the output of the calculator. The graphical display allowed you to see the settings of the dials on the Curta. I coded this between sessions or in the evenings. While waiting for another session to start, I would open up my MacBook and code a bit more. Soon enough, I had graphics working.

But the controls were still through the keyboard. I really wanted it to be fully controlled using the joystick. So, I started coding those interfaces. I could adjust the dials. I could crank the calculator. Soon enough, I only used the keyboard to signal the program to quit. Everything else was controlled using the joystick which was kind of similar to the real Curta.

CurtaSimIt still wasn’t quite enough. It didn’t make any of the grinding and clicking sounds of a real Curta doing calculations. The Apple // is actually pretty good at making grinding sounds. A bit more work and I had something approximating the sound of a Curta coming out of the speakers. I pretty much built the application I envisioned while walking back from breakfast a couple of days before.

On the final day, I sat nervously in my room waiting for the judges to come and see my entry. Before the public demonstration, the judges spent some time looking at the entrants. Once they arrived, I announced that “Lots of effort had been put into emulating the Apple // on newer platforms but I thought it was time that the Apple // emulate an older computing machine”. I gave a demo of the simulator and answered a few questions about how I coded it. They seemed impressed and I thought I did well.

CurtaSimA little while later, I had to demonstrate my simulator to all of the attendees. I was the first entrant to demonstrate and I did calculations on the real Curta and on my simulation. Then, I watched as people demonstrated their entries. There was a cool lo-res game. There were a couple of entries on the Apple /// demonstrating graphics and sound. There was a great modification to Applesoft Basic which allowed you to jump to subroutines by name instead of by line number. And many more great programs.

The winners were announced and I thought I might place. Third place when to the named subroutine utility. And second place was the lo-res game. And then they said that I had won first place! I was really taken aback. While still trying to absorb that I had won, I was asked which of several prizes I would like. I opted for a $50 gift certificate to Think Geek but I am not sure I really knew what my options were. I was still kind of shocked I had won. Since then, I used that gift certificate to pick up a couple shirts and some new puzzles like a 7x7x7 Rubik’s cube (not solved, yet).

Since then, I have published the source code to my program on github, was a guest on the Open Apple Podcast talking about my experience at KansasFest. I even wrote an article for JuicedGS about my HackFest entry. JuicedGS is the longest running Apple // publication and is still in print (I am ashamed to admit I only became a subscriber after KansasFest). I even was mentioned online in more mainstream computer news. There is an article at ComputerWorld about KansasFest and HackFest where my CurtaSim is among those featured.

Will I be going to KansasFest 2013? I sure hope so.

Tic-Tac-Toe

Tic-Tac-ToeAt work one day, I walked past my director’s desk and noticed he had an editor open and was typing some C code. That was strange (not as strange as it might be in other companies – our director definitely is capable of coding but generally doesn’t). So I asked him what he was up to.

We were looking to grow the team and he was considering asking candidates to code up an implementation of tic-tac-toe as a test. That way, we can see how they approach problems and their coding style. But he wanted to see how difficult the task was before asking anyone to do it so he was trying it out.

Intrigued, I went home that night planning to write my own. I decided to do my implementation in Perl. I didn’t want to write any code for data structures so I just wanted to use a language which had basic arrays and hashes built in. After a short time, I had an implementation which worked and would never lose. It computed all possible moves and scored them. If you weren’t careful, it would beat you. But it was pretty slow. The first move took a couple of minutes on my iMac which is a pretty fast machine.

The other feature of my implementation was that the size of the board was configurable. I decided to try a 4×4 game and it was unplayable. After a couple hours, it still hadn’t made a move.

But, that was enough of a proof of concept. At work though, others started talking about writing their own implementations. People were going to try Python, or C++ or raw C. People said they were going to make an implementation which was faster than mine and still search all possible moves. I needed to do better before I was beaten.

So, I tried again. I ported my implementation to C. And I started adding more smarts. I noticed that I could skip several board configurations. Perhaps the board is a mirror image of one I have already looked at. Or maybe a rotation of one already investigated. So, I added a cache to keep the best move given a board configuration and added code to recognize that one board state is symmetrical with another. That significantly shrunk the space of moves to search.

Then, I added “Grand Central Dispatch” support. On the Mac, this allows you to schedule tasks to multiple cores on the processor. That way, I could investigate multiple board configurations concurrently. With these changes, a 4×4 game became playable. It took my Mac a couple of minutes to make the first move but once it had pre-calculated everything, it was fast.

And as a challenge, I decided I would see if I could get the 3×3 game working well enough on some of my older machines. I have a C cross compiler for my Apple //e and my Replica One. I ripped out the “Grand Central Dispatch” code because that would never work on these old machines. I shrunk the data structures and did a bit of math in my head to see if they would fit. I needed to store enough state for all possible games on my Replica One which had 32K of memory. After a bit of optimization, I decided it would fit.

I compiled the program for the //e and the Replica One and they worked. Again, it took a couple of minutes to make the first move as it investigated all possible games but after that it was fast. And this was on a 8-bit processor running at 1MHz with as little as 32K of memory. I figured I had done enough to defend my reputation since I had a usable version working on nearly 40 year old hardware. More than that, I had a version of tic tac toe running on hardware nearly 40 years old which I assembled myself with a soldering iron. I win the title of “king of the geeks” and none shall challenge me.

And to this day, I don’t think anyone has even attempted their own implementations. If anyone does come to challenge me, I think I will learn OpenCL which will let me put the game search on the GPU in my iMac and then I can get a huge amount of parallelism. Maybe 5×5 becomes playable that way. Maybe…

Steve Wozniak at iPhone 4S Launch

IMG_0115I happened to be in Mountain View, CA for a short time on a business trip during the launch of the iPhone 4S. It was later in the day and I was thinking of leaving the office to get some dinner. Before I left though, I checked my news feeds to see if anything interesting was happening. That is when I read this article.

Steve Wozniak, the creator of the Apple // and one of the founders of Apple was in line to buy an iPhone 4S at the Los Gatos Apple Store. That was only about a 20 minute drive from where I was. This was my chance to meet someone who had seriously influenced the direction of my life.

I recently finished building my Replica One which is a replica of one of Woz’s first computer designs, the Apple 1. I grabbed a copy of a schematic of the Apple 1 and printed it out before leaving the office. My plan was to see if I could get him to sign it for me.

Once I arrived, I found Woz surrounded by a dozen or so people. And true to form, he seemed to be spending most of his time talking to the kids who were asking him what they should do be an engineer and build cool things. He gave great advice and I wish I recorded some video of what he was saying. I used my phone to get some pictures of him but it was tough with the low light and the crowds. Only two pictures ended up almost reasonable.

After he talked to a bunch of the kids, someone asked him for a picture and then another person on the crowd asked for him to sign something. I had my schematic, an iPad 2 which I was going to use as a surface for him to sign on and my pen in my hand. After a couple more people got their pictures or something signed, I got his attention and asked him to sign my document. I passed him the iPad 2 and schematic but he had a pen ready to go.

After starting to sign, his eyes focused more on what he was signing and he said “Hey, this is my design!”. I said it was significant to me because I had just assembled a Replica One and I planned to put the signed document next to my little piece of computer history. He said he loved the Replica One and thought it was great that some people still put systems together like they did back then with a soldering iron.

He finished signing the schematic and passed it back to me. I thanked him and probably had a crazy grin on my face and he went on to posing for more pictures or signing anything people brought to him.

Once I got home, we bought a frame for the signed schematic and it sits right now next to my Replica One and it reminds me often of the chance I had to meet Woz.

A Case for the Replica One

Replica OneI had already assembled my Replica One and powered it up to see that it worked. But, it was just a bare board. I had it connected to a power supply and a small USB keyboard. The Replica One didn’t have USB so I had it connected through a USB to PS2 adaptor. The whole thing sat on top of a piece of cardboard. It worked but it looked more like a bomb from a movie than a working computer. It needed a case.

Years ago, my dad and I build the Rand X computer together and that is where my hobby and my profession work in software began. I assembled the Replica One with help from Matthew. But I wanted a nice wooden case and for that, I wanted help from my dad.

We were planning a visit to Tillsonburg that summer so I prepared by drawing out a basic plan. I measured the key components. The motherboard is rectangular and I decided it would be best to have the long edge of the board run along the length of the case. The power supply would be to the left of the motherboard. Unfortunately, the power switch, serial port and video output would then have to come out the right hand side of the case. In the end, it seemed to be the best compromise so that is what we went with.

I arrived in Tillsonburg with some rough plans. It called for a shape which is more or less a rectangular box except the front, top slopes down where the keyboard is mounted. This approximated the shape of the Apple //. Also, I wanted the top of the case to be plexiglass so the board would be visible.

We sourced the plexi in London and went to pick up a piece. They cut it to the size we specified and when I asked, “how much?” they said not to worry about it. They had scraps bigger than that. We cut the panels to the appropriate sizes and shapes and screwed it together. We cut a large hole in the back panel for the power supply fan and power connector. We also cut a smaller opening on the right edge for the connectors on the motherboard.

We probably struggled the most with finding a good way to mount the board to our case. We ended up with small spacers which we screwed into the board and then screwed the spacers into the bottom of the case. It wouldn’t be too convenient to remove the board from the case but I didn’t plan to do that very often.

We drilled a small hole for the keyboard cable to pass through into the case so it could be connected to the board. Mom had some velcro which we often uses for their boat projects and we used to that connect the keyboard and the plexi to the case. After a couple of coats of varnish, we had a beautiful case for my Replica One.

Once I got the system home again after our trip, I remove the old piece of cardboard that everything used to sit on and cleared a spot for it on my desk. I hooked up the serial cable to the iMac and started loading programs onto it. I even got a C compiler working for the Replica One and I have coded a few things for it since then (more stories coming about that soon).

So, it sits beside me now in my computer room. I have many old computers here but it has a special place physically on my desk but also it means so much to me because of the work which went into it by Matthew, my dad and I.

Building The Replica One

IMG_0033One of the last things I did before we moved back to Canada was order a Replica One computer. The Replica One is a reproduction of the original Apple I computer designed by Steve Wozniak back in 1976. Shipping it to Canada would have been more expensive and more of a hassle and I always wanted one so I bought the kit. But with the move, I left everything in the box until I was ready to work on it.

Once we were settled, I was itching to start but I just didn’t have the room. I had my own room for my gadgets but I only had a tiny desk which had room for our iMac and printer but not much else. I really needed all new office furniture and a large desk to go with the large room.

By September, I had found the furniture collection I wanted and ordered it online. But months later, it was still back ordered. Someone didn’t want me to work on my computer project.

By November everything arrived and in a couple of evenings of work, I had the furniture all assembled. With desk space, I decided to bring out some of my other old hardware. Like the Apple //GS I used throughout university and have completely customized in a tall tower case. Or my uncles old Apple //e which needed a bit of cleaning but still works great. My BeBox which replaced my Apple //GS as my main computer when I started working life. The BeBox is probably the rarest machine I own and the model I have is thought to be one of about 800 ever sold.

But, while waiting for room to work on my project, I also started collecting some other old systems. I found an original Mac 128k on eBay and bought it. I have a video of Samantha using it in the kitchen. Now it has a permanent spot next to our iMac which is many orders of magnitude faster. It works well and Samantha often asks to use it. She loves MacPaint.

I also got a Apple MessagePad 2000 on eBay. These devices are often called “Newtons” although it is the software on them that is branded Newton. The hardware is MessagePad. It is a strange device and ahead of its time in many ways. The Palm Pilot which followed it is definitely a refinement and simplification of the MessagePad and it succeeded because it was a better compromise for size, battery life and cost. But it is a pretty neat machine and in some ways is a predecessor of the much more successful iPod and iPhone mobile devices which Apple would make much later.

The final machine I bought off eBay recently was an Apple Lisa 2. This is quite a rare machine and is a predecessor of the Mac and is one of the first machines with a graphical user interface. The model I have has a single 400k floppy drive and a 10M internal hard drive. The hard drive is physically huge. Given that 3TB hard drives exist today, you can probably have about 12TB of disk space in the same physical dimensions as this 10M drive. That is about 1,250,000x more capacity in the same physical space. The machine itself was in Ottawa so I was able to inspect it before bidding on it and once I had won it, I didn’t have to pay shipping costs since I just had to pick it up. It was missing a keyboard but I found one in another auction. The system does power up but it doesn’t boot. There is definitely an error booting to the hard drive but I am not sure what the problem is yet. It could be that the OS isn’t loaded on the hard drive which means I have to find some way to write some floppies. That alone will be an interesting challenge.

The only other machine I am tempted to try to find is a Next Cube but they are rare enough that they tend to go for $1000 or more. I just can’t justify that much money for something that old, regardless of how cool the hardware is (or was).

But what I really wanted to work on was the Replica One. I setup the desk and put some of my old machines together in the corner of the L where I could work with them but they also wouldn’t be in the way too much. The iMac sat on on end of the L leaving the other side empty. Also before moving, I bought a very good soldering iron at Fry’s so I set that up. I put a nice bright desk lamp there also to help me get enough light.

I was bit nervous to start since it had been years since I did any soldering and never really did anything this intricate. I watched a bunch of YouTube videos on soldering technique just to review and prepare. One night a couple of weeks ago, I opened up the box and organized all of the parts. The instructions suggested starting with the resistors and there were only a dozen or so to mount so I dove in.

In a short time, I had all of the resistors mounted. The next day, I soldered all of the sockets. Then, the capacitors. A day or so later I was soldering on the connectors and other devices. Every day, I would show Matthew the progress and demonstrated soldering for him. But once all of the soldering was done, Matthew would help me out more.

First, we needed to make sure that the connections were good. Without inserting any chips into the sockets, I hooked the board up to the power supply and turned it on. We got a red light from the LED which was a good sign. Using the voltmeter, Matthew and I checked +5 and ground on all of the key pins. Everything looked good. Time to power it off and move to the next step.

With bedtime fast approaching, we started mounting the chips into their sockets. There were only 10 chips to insert (versus the dozens of chips found on the original Apple 1) but it was slow going because we didn’t want to bend any pins. With all of the chips mounted and Cynthia ready with the video camera, it was time to power it up. And it worked! A quick reset and I was in the monitor. A quick instruction in the monitor and I was in Apple basic. A quick command in Apple basic and I was running a program. We had built a computer!

In many ways, this project was a way to relive the building of the Rand X computer my dad I built nearly thirty years ago. The Replica One is actually less powerful than the Rand X. My Replica One has 32k of memory versus the 64k we had in the Rand X. But my Replica One is also built to interface better with technologies of today. It has a PS/2 port for a standard PC keyboard. It has a serial port which you can use to send it programs. I am currently waiting for a USB to serial cable so I can hook the iMac up to the Replica One and downloads some programs to it.

And I bought a compact flash reader for the Replica One. This lets me store programs on a compact flash card. The Apple 1 never had a disk drive. All it supported for storage was cassette tape. Compact flash is a much more convenient solution. However, it was difficult finding a good flash card to buy. The problem is that regardless of the size of the flash memory, the reader will only give you access to the first 32M of space. In the store, the smallest and cheapest I could find was 4G. So, I now have a 4G compact flash card inserted into a device with 32k of main memory. Of that 4G, I can use only 128th of it and of that 128th, I will be hard pressed to use even a megabyte of space.

Matthew has shown some interest in learning more about the Replica One also. I showed him just a bit of Basic and how he could use it to write programs which can do his math homework for him. That seemed to get his attention. I often wonder what the best route is to get a child into programming today. Making a program which counts from 1 to 100 on today’s machines just seems so anti-climatic. But to get a machine which is nothing more than a bare circuit board hooked up to a keyboard and monitor to count to 100 just seems like more of an accomplishment. At least I think so. We will see whether Matthew thinks so too.

The next step is to build a case for it. Today it is sitting on a piece of cardboard but my plan is to build something out of plexiglass. I also need to find a keyboard which is a bit smaller and more appropriate to mount into the case.

So my Replica One joins my museum of old technology. But unlike the other ones, this one is just a bit more unique because we assembled it ourselves.

WWDC 2010

IMG_0068Since Apple announced the ability to write your own applications for the iPhone, I have been working on different things. I even have an app up on the store right now (see www.halcyontouch.com for more details). Every year, Apple holds a developer conference in San Francisco and I hoped to attend before we moved back. Sure enough, when the dates were announced, it was a couple weeks before our move so I bought myself a pass.

Everyday, I caught a Caltrain at 7:13 AM which is a bit early for me. And I often wouldn’t be back home until 10:00 or later after attending different parties in the evening. I was there for the announcement of the iPhone 4 but more important were the technical sessions and the labs. At the labs, I could show my app to an Apple engineer and get assistance on something I was having trouble with. Sometimes I learned I was doing this correctly but often I would leave with a longer list of things to improve.

The different evening events were great. On Tuesday night, there was a “Stump The Experts” event where the audience and about 20 Apple employees tried to out do each other with arcane technical and Apple history trivia.

Wednesday night, I got to see and touch some of that Apple history. At this party, they had several old machines like a Lisa, a Macintosh 512 and even an Apple I owned by Apple employee number 16 who was there to demo it. I snapped a bunch of pictures and chatted with people about what machines the we had used. I told several people that I had bought an Apple I replica kit so soon I would assemble my own reproduction of history.

Thursday night was the big party put on by Apple. It was pretty crazy. I met several people like Bill Atkinson who are as close as it comes to celebrities in the Apple community. Later, Ok Go came out to perform. Unfortunately, I couldn’t stay to the end but I had a train to catch and by then, the weeks activities had me pretty exhausted.

It was pretty expensive but doing it after our move back to Ottawa would have costed much more. It was a great chance to learn more about my iPhone development hobby and indulge my love of all things Apple.

My Empire Tribute

Thirty years ago, The Empire Strikes Back opened in theatres. I saw the original Star Wars but I was a bit young then. But, for Empire I was a bit older and it was just an incredible movie for me. Like most kids my age, I had my share of action figures from the movies and space ships. I also watched all of the special “making of” TV shows which gave you some idea of the amount of work which went into each film. So, I took our Super 8 camera and some of my toys and made my own version of the movie or at least part of it.

In honour of a movie which was very important to me when I grew up and its 30th anniversary, I thought I would put my movie online today. There is no sound because our camera didn’t record sound. Also, it has gone through a number of conversions which explains its sorry state and is not a reflection of the film maker himself. It was converted from film to a VCR tape years ago by my parents along with a number of other home movies. A while ago, I used our DVD recorder to burn the VCR tape to a DVD. More recently, I ripped that DVD to a MP4 file on our computer. So, it has been converted a number of times and maybe needs the wizards at ILM to return it to its former glory (or whatever it was originally).

Happy Birthday to The Empire Strikes Back.

We Are Homeowners Again

As of Monday, we closed the transaction on our new house in Kanata and we officially own a home again. We are arranging lots of details and don’t yet have our new phone number. Once we know what the new number is, expect to get an email from us with our new contact information.

But, we won’t actually be back in Ontario until late June and likely not moved into the house until early July. We still have a bunch to do before the move. I am arranging all of the documentation to import our cars. We are arranging mail forwarding, canceling services here and setting up new services in Canada. We still have several weeks but we will be busy getting everything prepared for the big move back.

Hope to catch up with everyone later this summer and we will be happy to host you if you want to visit us in our new house.